This guide walks property managers and building owners through how to find water leaks, which tools and methods to use, how to interpret what you find, and exactly what to do when you confirm a problem.
Key Takeaways
- According to NAIOP citing Zurich North America, water damage was the leading cause of property loss in commercial buildings in 2021
- A single breach can cascade through ceilings, elevator shafts, and wall cavities for hours before anyone notices — often overnight or on weekends
- Detection methods range from visual inspection and water meter isolation testing to technology-assisted scanning — each suited to different building types and risk levels
- Automated systems (wireless sensors, flow meters, sensing cables) provide 24/7 protection that scheduled inspections alone can't match
- Acting within the first few hours of a confirmed leak cuts structural damage, mold risk, and claim complexity
Why Water Leaks Are So Costly in Commercial Buildings
The average commercial water damage claim runs approximately $89,000, according to Chubb data cited by NAIOP. That figure assumes a contained, single-floor event. In practice, multi-story buildings rarely experience contained events.
The Multi-Floor Cascade Problem
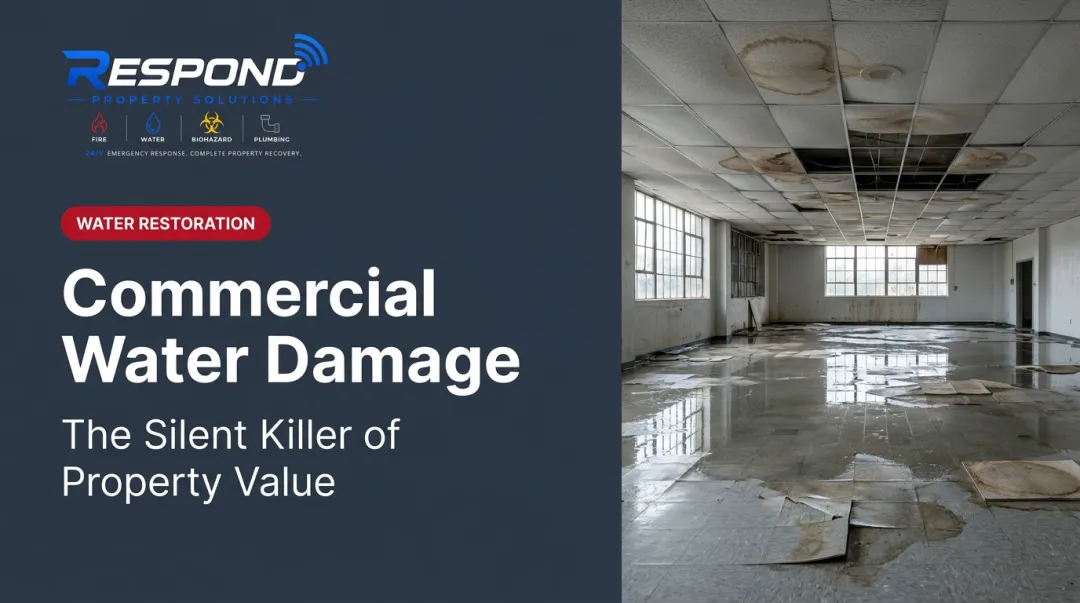
A leak on a high floor doesn't announce itself. Water follows gravity through ceiling assemblies, pipe chases, and elevator shafts — often traveling multiple floors before anyone notices pooling or staining. Weekend and off-hours events are the most destructive; by Monday morning, the damage has compounded across every floor the water touched.
Real-world examples documented by Watts Water Technologies in CE Center's continuing education materials put this in concrete terms: a toilet overflow that traveled from the 17th floor to the lobby, and a nine-floor leak that totaled $600,000 in damages.
Secondary Costs That Compound the Claim
Structural repair is only part of the bill. The full cost of a commercial water event typically includes:
- Mold remediation — The EPA states that mold can begin growing within 24–48 hours of moisture exposure if materials aren't dried promptly
- Tenant displacement — Units or floors may be uninhabitable during drying and reconstruction, triggering lost lease income
- Emergency restoration fees — After-hours and large-loss mobilization costs are higher than standard project pricing
- Insurance consequences — NAIOP notes that repeated water damage claims can lead insurers to raise premiums, increase deductibles, or restrict coverage terms at renewal
These costs stack fast. A $89,000 structural claim can double once mold remediation, tenant relocation, and premium increases are factored in — which is why detection systems tend to pay for themselves after a single prevented event.
What You Need to Detect Water Leaks in a Commercial Building
The right tools and access conditions are what separate a thorough inspection from one that misses the source entirely.
Tools and Indicators Required
Core tools used across detection methods:
- Pin-type and non-invasive moisture meter — for testing wall surfaces and building materials
- Flashlight or inspection light — critical for under-sink cabinets, pipe chases, and ceiling voids
- Utility knife or probe — for testing damp or soft materials for structural integrity
- Water meter reading log — required for isolation testing
- Thermal imaging camera — rentable if not owned; markedly improves hidden leak detection
- Pen and notepad — document readings, locations, and conditions as you go
Inspectors should also have access to the building's plumbing schematics or riser diagrams. Knowing where supply lines, drain stacks, and HVAC condensate lines run is essential for narrowing your search so you're not tracing pipe runs blind through finished walls.
Preconditions and Setup
Run inspections with the building in its normal operational state — water supply active, HVAC running — so active leaks remain detectable.
Prioritize access to these areas first:
- Under-sink cabinets and around toilet bases
- Ceiling tiles directly below upper-floor bathrooms
- Mechanical rooms and HVAC drain pan areas
- Basement pipe chases and utility corridors
- Any spaces where plumbing was recently modified or renovated
Three Methods to Find a Water Leak in a Commercial Building
The most reliable inspections combine at least two methods. Each approach has distinct strengths; choose based on the suspected leak source, building type, and tools available.
Method 1: Visual Inspection
What it is: A systematic walk-through of all plumbing-adjacent areas looking for physical signs of moisture. No specialized equipment required — every inspection should start here.
How to conduct it:
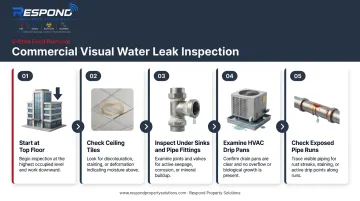
- Start at the top floor and work downward — this follows the direction water travels and helps distinguish the leak source from downstream damage
- Check ceiling tiles for staining, discoloration, or sagging — soft tiles often indicate long-term saturation above
- Inspect under sinks, around toilet bases, and at pipe fittings for mineral deposits or efflorescence (white salt deposits on concrete or masonry)
- Examine HVAC drip pans for standing water, rust staining, or overflow marks
- Look along exposed pipe runs for corrosion, staining, or joint seepage
Where it falls short: Visual inspection only catches leaks that have already caused surface-visible damage. Slow leaks inside walls, under raised floors, or above hard ceilings won't appear until significant damage has already occurred.
When visual inspection reveals damage but not the source, a meter isolation test can confirm whether active water loss is still occurring.
Method 2: Water Meter Testing (Isolation Test)
What it is: A flow-based test that confirms whether water is moving through the supply system when all fixtures are confirmed off. It tells you whether a leak exists before you start searching for where.
How to conduct it:
- Confirm the building is fully unoccupied and every fixture — toilets, faucets, ice makers, irrigation — is off
- Record the water meter reading (take a photo of the meter display)
- Wait 30–60 minutes without using any water
- Re-read the meter — any movement in the dial or digital display indicates active water loss
Where it falls short: This method works well in smaller buildings or isolated zones with sub-meters. In large multi-tenant commercial buildings with constant HVAC loads, cooling towers, or 24-hour operations, background flow makes baseline readings harder to interpret accurately.
If the meter confirms active loss but neither the source nor the damage is visible, technology-assisted methods can pinpoint the location without cutting into walls.
Method 3: Technology-Assisted Detection
What it is: Moisture meters, thermal cameras, and acoustic listening devices can locate leaks hidden inside walls, under flooring, or above ceilings — without destructive investigation.
How to conduct it:
- Moisture meter scanning — Run a non-invasive (pinless) meter across drywall surfaces near suspected areas. Wagner Meters puts acceptable interior wood moisture at 6–8%; readings above 14–17% in a wall assembly warrant further investigation. Cross-reference with a second method before opening walls.
- Thermal imaging — Identifies cool, damp patches where evaporation creates a temperature differential on wall and ceiling surfaces. As FLIR notes, thermal cameras detect temperature differences, not moisture directly — always confirm with a moisture meter.
- Acoustic listening devices — Detect the hissing or dripping sound of pressurized water escaping a joint or crack. Most effective on supply lines above 30 psi; less reliable on drain systems or very slow seepage.
Where it falls short: Thermal imaging requires training to interpret correctly. Ambient temperature, humidity, and surface finishes all affect readings. Acoustic tools work poorly on unpressurized drain lines.
Commercial Leak Detection Systems: Your Long-Term Line of Defense
Manual inspection is reactive. Installed detection systems are continuous. The four main categories of automated technology each serve a different role in a complete protection strategy.
Stand-Alone Point Sensors and Sensing Cables
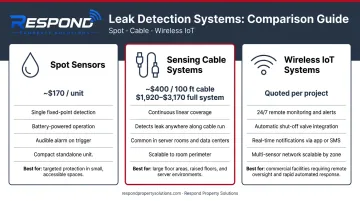
Spot sensors (sometimes called "flood pucks") are battery-powered devices placed at floor level near high-risk areas — under HVAC units, around water heaters, beneath drain pans. When water contacts them, they trigger an audible alarm. Hardware costs start around $170 per unit. They're inexpensive and easy to deploy, but require someone nearby to hear and respond.
Sensing cable systems detect water at any point along a continuous wire routed across a floor or around equipment. A 100-foot cable runs approximately $400 in hardware; full controller/cable systems are priced from roughly $1,920 to $3,170. These are common in server rooms and data centers where broad coverage is needed but require fixed installation and electrical power.
Flow Metering and Inline Sensors
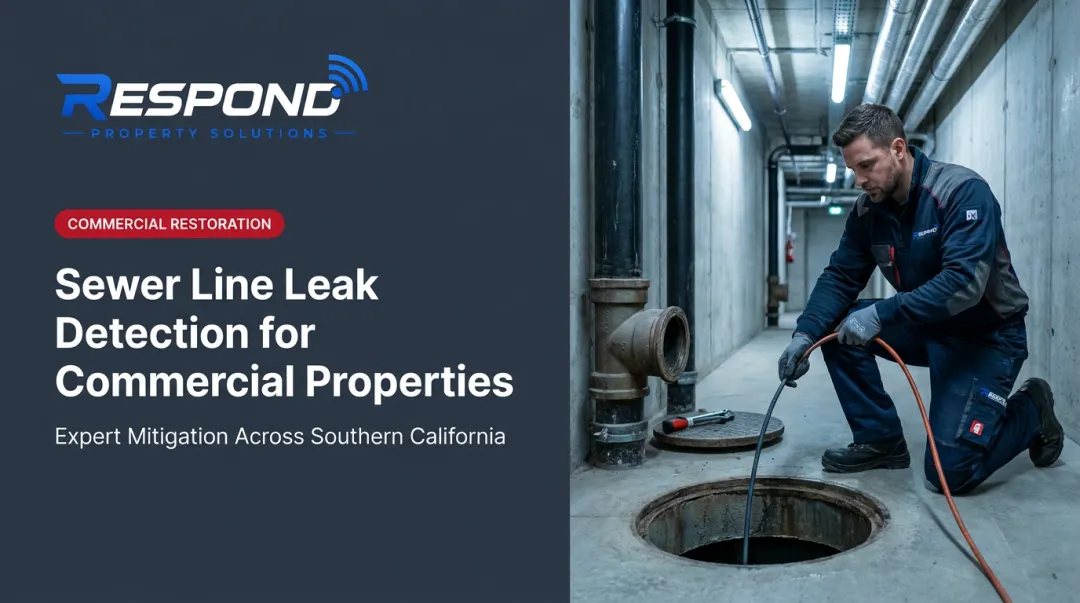
Inline flow meters monitor consumption patterns on supply pipes and flag abnormal increases that suggest active water loss. They detect that water is escaping the system but can't tell you where — making them most effective as an early-warning trigger that initiates a manual inspection or activates point sensors in a combined system.
Wireless IoT-Based Systems
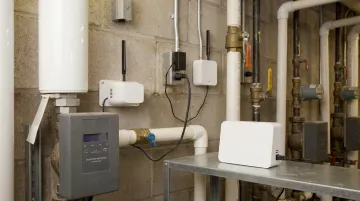
Modern wireless systems combine battery-powered sensors, distributed RF hubs, and a cloud-connected base station to deliver real-time leak alerts by phone, text, and email — regardless of whether the building is occupied. Many configurations also integrate automated shut-off valve controllers that close the water supply within seconds of an alarm.
FM Approval Standard 7745, the third-party certification framework for commercial leak detectors, requires an alarm within 30 seconds of leak identification. Real-world results support the value: WINT's IoT system detected cooling-tower irregularities at the Azrieli Center complex, saving a documented 25 million gallons of water per year.
Wireless commercial systems are typically quoted per project. The numbers make the case:
- Average commercial water claim: $89,000
- Multi-floor events: $600,000 or more
Most installations pay for themselves after a single prevented event.
How to Interpret What You Find and What to Do Next
Knowing what you're looking at matters as much as finding it. Misreading results leads to either unnecessary demolition or dangerously delayed action.
Normal / No Active Leak
Moisture meter readings within normal range, no visible staining, a flat meter dial during the isolation test, and dry drain pans all indicate no current active leak. Document your baseline readings and schedule the next formal inspection within 90 days as part of a proactive maintenance log.
Minor or Early-Stage Signs
Minor findings include slight ceiling tile discoloration, moisture readings slightly above baseline, a slow drip at a pipe fitting, or a water bill trending upward without explanation. This is the most important stage to act on — repairs at this point are typically minor.
Steps to take:
- Isolate the suspected source
- Make the repair or call a licensed plumber
- Re-inspect within two weeks to confirm the issue is resolved
Active or Confirmed Leak
Confirmed indicators include: visible running water, floor pooling, a meter dial that continues moving with all fixtures off, or thermal imaging showing a spreading cold patch.
Immediate actions:
- Shut off the water supply to the affected zone (or the full building if the zone valve location is unknown)
- Document damage with photos before moving anything
- Contact your insurer and initiate the claims process
- Call a certified commercial water damage restoration team immediately to begin extraction and drying before mold sets in
For commercial properties in Southern California and Arizona, Respond Property Solutions offers 24/7/365 emergency response with IICRC-certified crews. A single project manager handles Xactimate-compatible documentation and direct adjuster coordination from first call through final walkthrough, across all seven counties they serve.
Severe or Widespread Damage
The following indicators signal a large-loss restoration event requiring immediate professional response:
- Multiple floors affected by saturation
- Visible mold growth on walls, ceilings, or structural materials
- Structural softening of floor or ceiling assemblies
- Water intrusion in electrical rooms or elevator shafts
At this stage, professional extraction, structural drying, and documentation are required immediately. Delays after widespread saturation significantly increase mold growth risk and draw greater scrutiny from insurers on claim timelines. Mold can begin colonizing saturated materials within 24–48 hours of exposure.
Common Errors and Best Practices in Commercial Water Leak Detection
The Most Consequential Mistakes
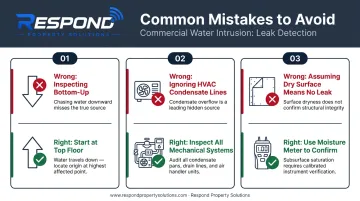
Three orientation errors consistently produce missed or misidentified leaks:
- Starting inspection from the bottom floor upward. Water travels down, so damage visible on lower floors often originates several floors above. Starting at the bottom confuses the damage location with the leak source.
- Ignoring HVAC condensate lines and pipe chases. According to Chubb, HVAC-related failures account for approximately 8% of commercial water damage losses — driven primarily by clogged condensate drains, frozen evaporator coils, and improperly connected supply lines.
- Assuming a dry surface means no leak. Moisture wicks laterally several feet from its entry point before becoming visible. A dry wall surface near a pipe run does not confirm the system is sound.
Misreading Moisture Meter Results
Moisture meters don't read moisture in isolation — they respond to everything in the material. Common sources of false or misleading readings include:
- Coatings and paint layers on drywall or flooring
- High salt content in concrete or masonry
- Temperature differentials across wall assemblies
- Recently cleaned or wetted surfaces
Non-invasive scans should always be cross-checked with a second method — a probe reading, thermal confirmation, or physical investigation — before opening any walls or flooring.
Best Practices for an Ongoing Program
- Install automated sensors at all high-risk points: HVAC units, water heaters, restroom fixtures, and mechanical rooms
- Maintain a monthly meter-reading log to track consumption baselines and catch gradual increases early
- Schedule a formal visual inspection quarterly
- Train all building staff on the location of every zone shut-off valve — before they need to find it under pressure
Safety note: When inspecting areas near electrical panels, server rooms, or switchgear, always confirm the space is safe before entering any area with standing water. Never reset an automated sensor or reopen a valve until the source of the leak has been confirmed repaired.
Conclusion
Effective water leak detection works as a layered system. Routine visual inspection, meter monitoring, technology-assisted scanning, and automated hardware each close gaps that any single method leaves open. Used together, they provide the coverage commercial buildings actually need.
Early action is consistently less expensive than delayed response. Whether you're dealing with a slow drip at a pipe fitting or an active multi-floor event, catching a leak two days late can add tens of thousands of dollars to the bill — and weeks to the restoration timeline.
One of the most practical risk management decisions a property manager can make is establishing a relationship with a commercial restoration team before a loss occurs. Respond Property Solutions operates 24/7/365 across Southern California and Arizona, with a live answer in 45 minutes and crews on-site within 2-4 hours — and one project manager handles the job from first call to final walkthrough. When water is moving through a building at 2 a.m. on a Saturday, the vendor decision should already be made.
Frequently Asked Questions
How do you find a water leak in a commercial building?
Start with a visual inspection from the top floor downward, checking ceiling tiles, under-sink areas, and HVAC drain pans for staining or moisture. Confirm suspected activity with a water meter isolation test. Then use a moisture meter or thermal camera to pinpoint hidden saturation inside walls or above ceilings without destructive investigation.
What are the three types of leak detection?
Three primary categories cover most commercial applications:
- Point/spot sensors — detect water at a single fixed location
- Flow meters — monitor supply line volume and flag abnormal usage patterns
- Cable or rope sensors — detect water at any point along their length, suited for broad coverage areas like server rooms or mechanical floors
How much does commercial water leak detection cost?
Hardware entry points range from roughly $170 for a single spot sensor to $400 for a 100-foot sensing cable. A complete cable controller system runs $1,920–$3,170. Wireless IoT systems for commercial buildings are typically quoted per project based on floor count, pipe zones, valve sizes, and monitoring requirements. A single prevented claim — averaging $89,000 — generally covers the cost of a complete installation.
What are the most common signs of a water leak in a commercial building?
Key indicators include stained or sagging ceiling tiles, unexplained increases in water bills, musty odors or visible mold, reduced water pressure at fixtures, and moisture meter readings above normal baseline near plumbing runs. Off-hours events often mean the first visible sign is already downstream damage rather than the source itself.
Does installing a leak detection system lower commercial property insurance premiums?
Many commercial insurers treat proactive detection systems favorably when assessing risk — carriers like Zurich Resilience Solutions and FM Global have explicit frameworks that recognize leak detection technology. Some carriers aligned with FM Global standards may offer improved coverage terms or rate benefits. Confirm specifics with your individual carrier, as published percentages vary and vendor claims should not be taken at face value.
What should I do immediately after finding a water leak in my commercial building?
Shut off the water supply to the affected zone, then document all visible damage with photos before moving or removing anything. Notify your insurer and begin the claims process. Contact a certified commercial water damage restoration company promptly — mold can establish within 24–48 hours, so professional extraction and drying must start immediately to limit both damage and claim scope.